Free Pattern for a Civil War Soldier's Cot Quilt
Sheets and Quilts are now very much wanted. The latter should be seven feet long, four and a half feet wide and may be made of old calico or delaine, with cotton quilted firmly between, so that it will not lose its place on being washed.* Soldiers' Aid Society in Northern Ohio, 1863
As the war progressed far longer than anyone on either side had imagined it became more and more difficult to supply bedding both for soldiers in the field and their hospital cots. The challenge was even greater for women in the South as fabric of any kind became extremely scarce.

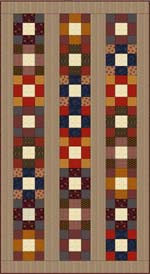
This pattern is an easy cot quilt pattern that could be made quickly as the need was urgent. Sometimes such a quilt was made by a group and each participant signed a block. Encouraging words could be included as well.
Few of these quilts survived the war but those that are known leave us with the impression that basic nine patch patterns like the pattern shown here were often used.
If you decide you want your quilt to be signed you can either sign each person's name on the central block yourself or give one block to each person and have them sign it. Doing this before you make the blocks will make it possible for re-dos in case of ink smudges, etc. Use a fine point pen with washable ink. Embroidering the names came later in the century.

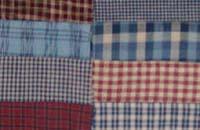
Although most reproduction fabrics from this period would be fine to use you might want to look for some woven stripes, checks and plaids. These were very common in everyday quilts during the Civil War era. 2 Such quilts were usually scrappy, with several fabrics included.
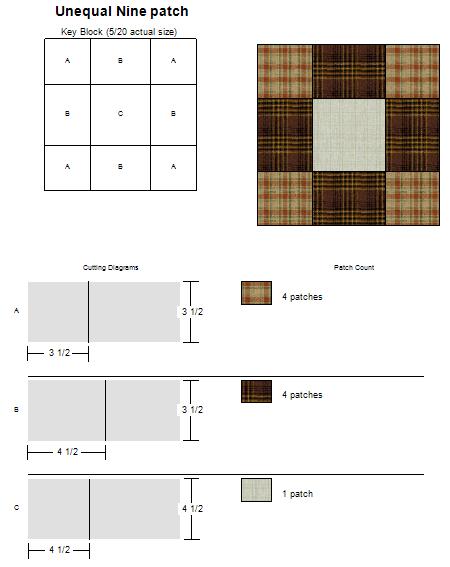
Below are the cutting measurements for the fabric. After cutting, sew together each row; top, middle and bottom. Then sew the sets of three together to finish the block.
Next sew together each of three rows of eight blocks.

Measure a pressed row of nine patch blocks lengthwise. That will be the length for your long vertical strips. Cut 4 of them 5 1/2 inches wide. Sew them between the block rows and on each end. Press.
Now measure the width of the sewn together and pressed blocks and strips. This will the length of your bottom and top horizontal strips. Sew them on.
Cut your backing so you will have an extra three or four inches around the quilt. Your batting should be a little larger too. I spread my quilts out on my living room floor to safety pin the layers together.
The easiest way to machine quilt this would be to quilt in the ditch. Though this would not be typical of the Civil War period, it is the simplest machine quilting method for beginners. If you are more experienced with free motion quilting or like to do handquilting a grid or diagonal lines would be typical for utilitarian quilts like this. By the way, some women had sewing machines during this period and were proud of their machine made quilts.
You can tie your quilt with yarn or heavy thread if you prefer. Put a tie at the corner of each block and the corner of each central square.
One way utility quilts were bound was by folding the back fabric over to the front for the binding. This took less fabric as separate binding material didn't need to be cut. After quilting trim the front and batting to about 1.4 inch from the seam. Then cut the backing fabric 3/4 to one inch wider than the quilt. Next double fold it to the front. Finally hand or machine sew the binding down along the top edge of the binding.
� 2008 Judy Anne Breneman
print a printer friendly version of this page* p87 "Quilts for Union Soldiers in the Civil War" by Virginia Gunn,
Quiltmaking in America: Beyond the Myths
"Quilts From the Civil War", by Barbara Brackman


